In this article we will look at how to apply themes to the rooms in your 2D views in Revit files.
By following this procedure you will be able to prepare the 2D views of your Revit files in Power BI and assign colors and themes to the rooms. You will then be able to extract characteristics or import external data and relate them directly to the rooms to do analysis in your reports as well as you can do using 3D views.
Preface
Before importing your file into Vcad you need to do some preliminary processing.
The room highlighting mechanism we will use consists of applying FIELD COLOR LEGEND to a 2D view. In this way we will define a base of room highlighting to which we will then apply the desired themes. If there is no FIELD COLOR LEGEND in the 2D view the room area will not be seen as highlightable by Autodesk Forge. So you need to create the LEGEND to activate this mechanism and assign a neutral color to all the rooms which will be the base color they will have when no color is applied in Power BI.
Work on your file
Below is the procedure we followed; surely there are other ways to achieve this result.
As a first step, we select the 2D view in Revit, then the floor plan, that we want to use. We can of course repeat the procedure for each floor.
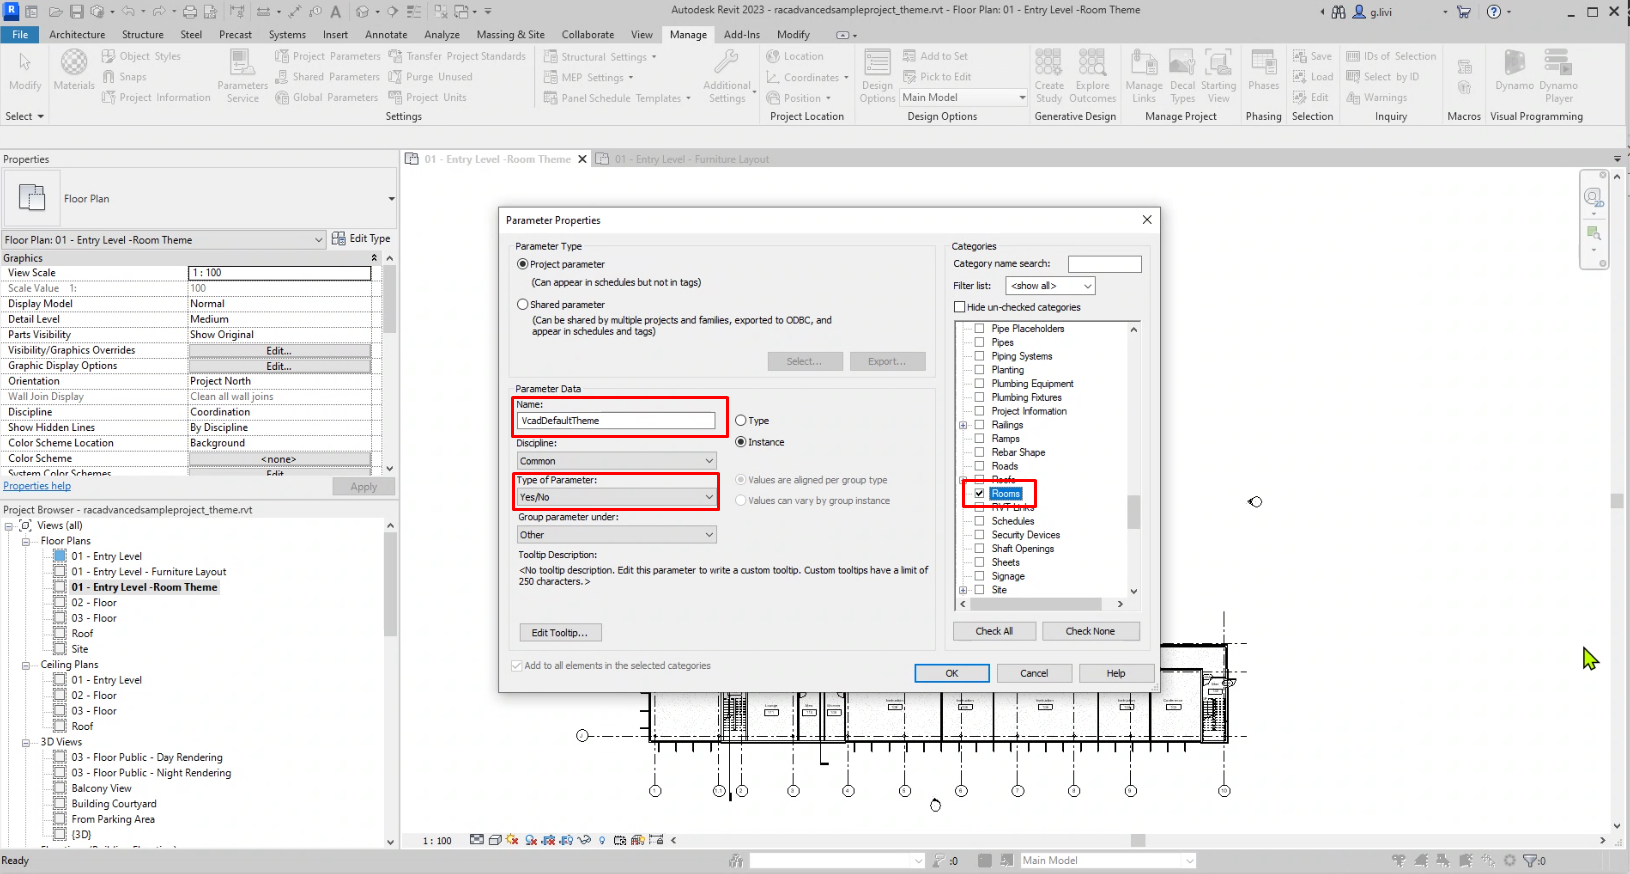
Then select from the MANAGE tab, the PROJECT PARAMETERS item and in the window that opens click on the highlighted icon to add a new parameter. Finally click OK.

Then fill in the NAME field, select for example YES/NO in the TYPE OF PARAMETER field, and check the ROOMS item in the list on the right as shown below. Finally click OK.
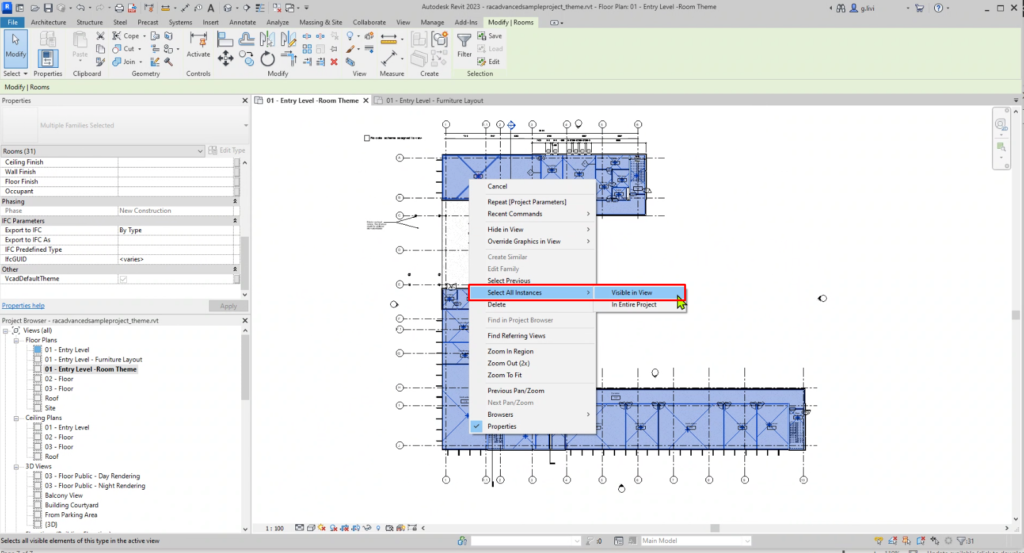
Select all the rooms, then right-click on them and select the SELECT ALL INSTANCES and VISIBLE IN VIEW option.
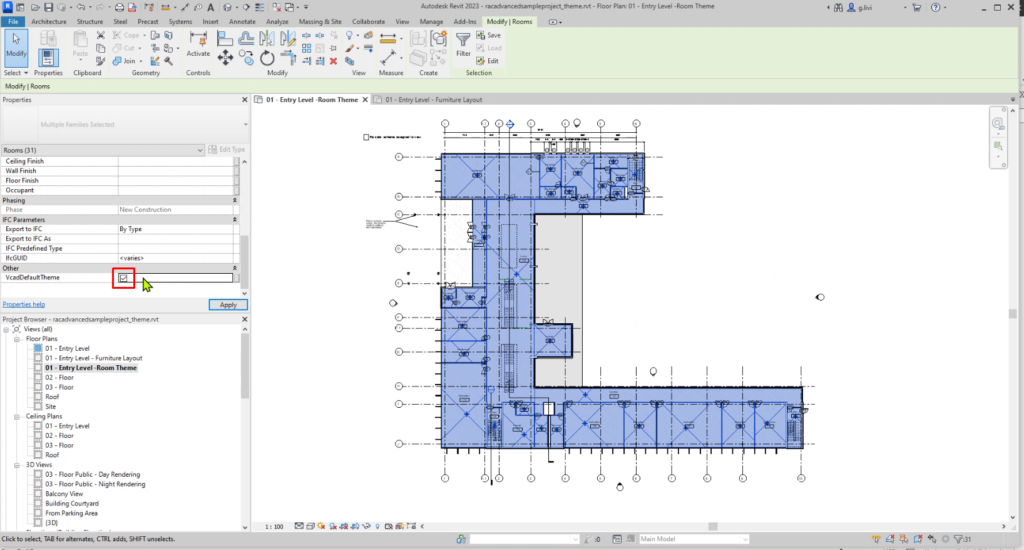
Next, select the parameter you created earlier (it shows up as unenabled) to enable it. In this case, disable and re-enable the checkbox as shown below and then apply.
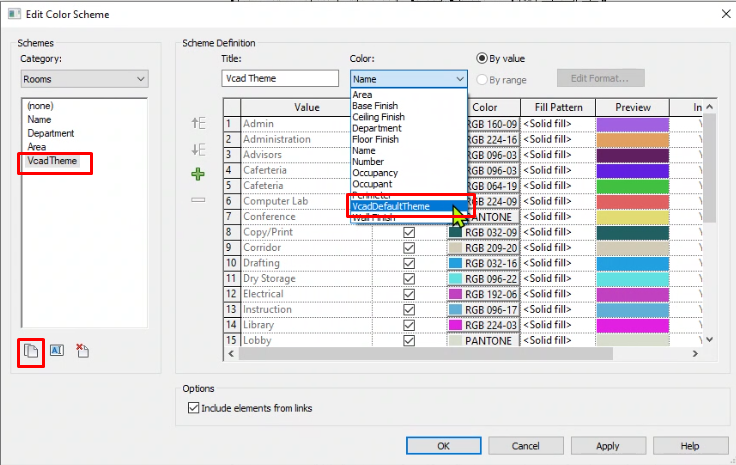
Now we need to create a new color scheme and apply it to the plan.
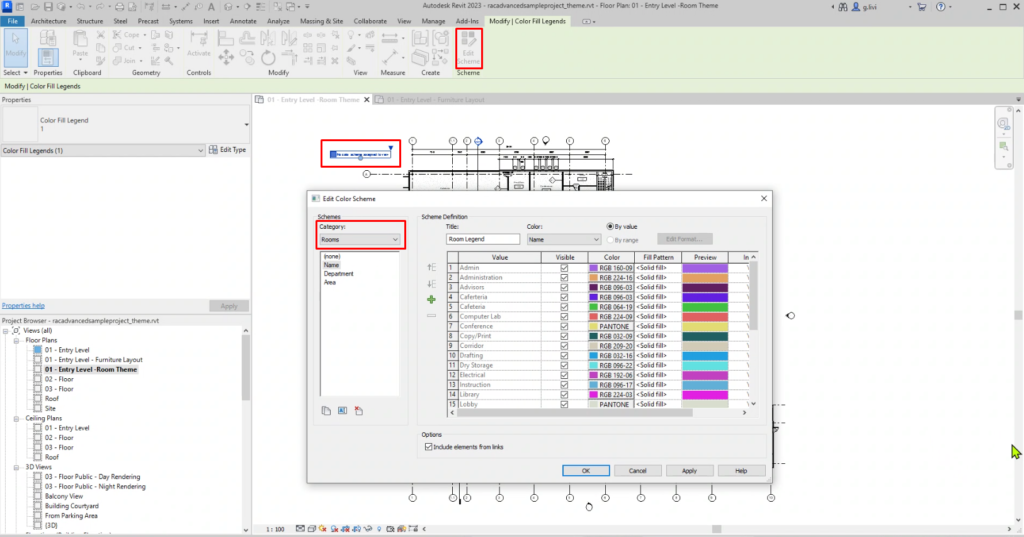
Select the legend in the view, click the EDIT SCHEME option in the MODIFY/COLOR FILL LEGENDS tab, and select the ROOMS category in the window that opens.
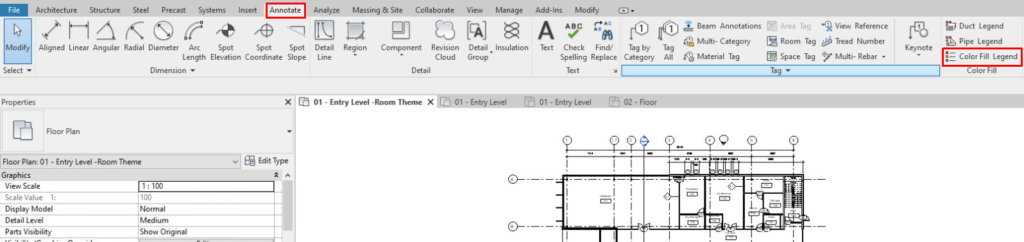
If the legend is not present, create a new one from the ANNOTATE tab and then COLOR FILL LEGEND.
Click on the icon at the bottom left to add a new color scheme, give it a name, a title, and select from the COLOR combo the parameter you created earlier. Finally click OK.
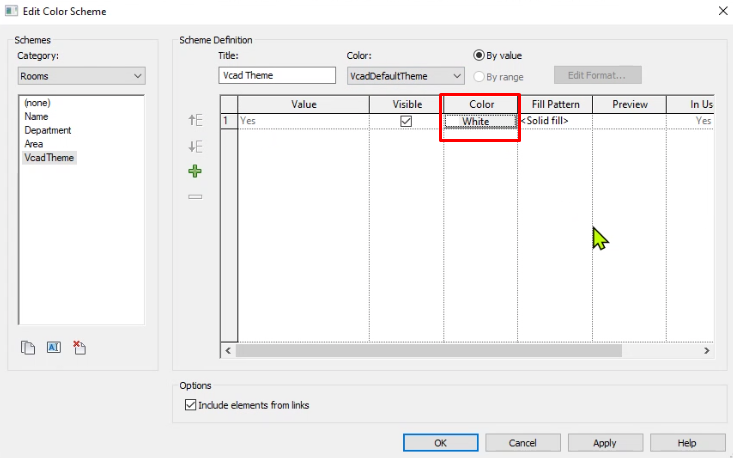
At this point you should see a single line in the color scheme, assign it the color for example white as shown in the figure. Finally click OK.
Adjustments
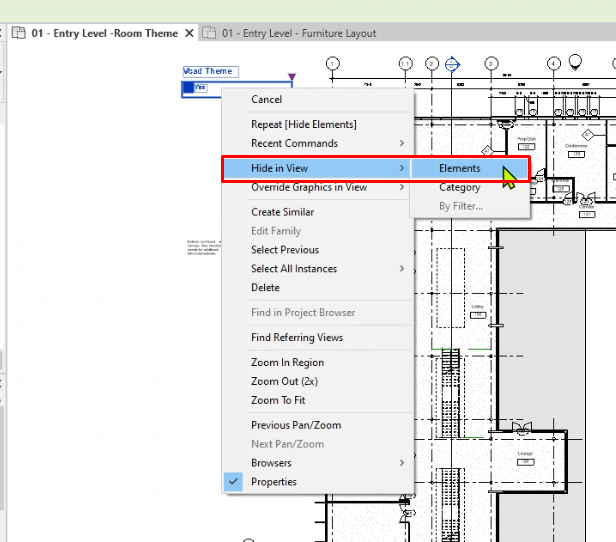
Now hide the legend so that it is not shown in Forge.
Right mouse button on the legend, HIDE IN VIEW and ELEMENTS.
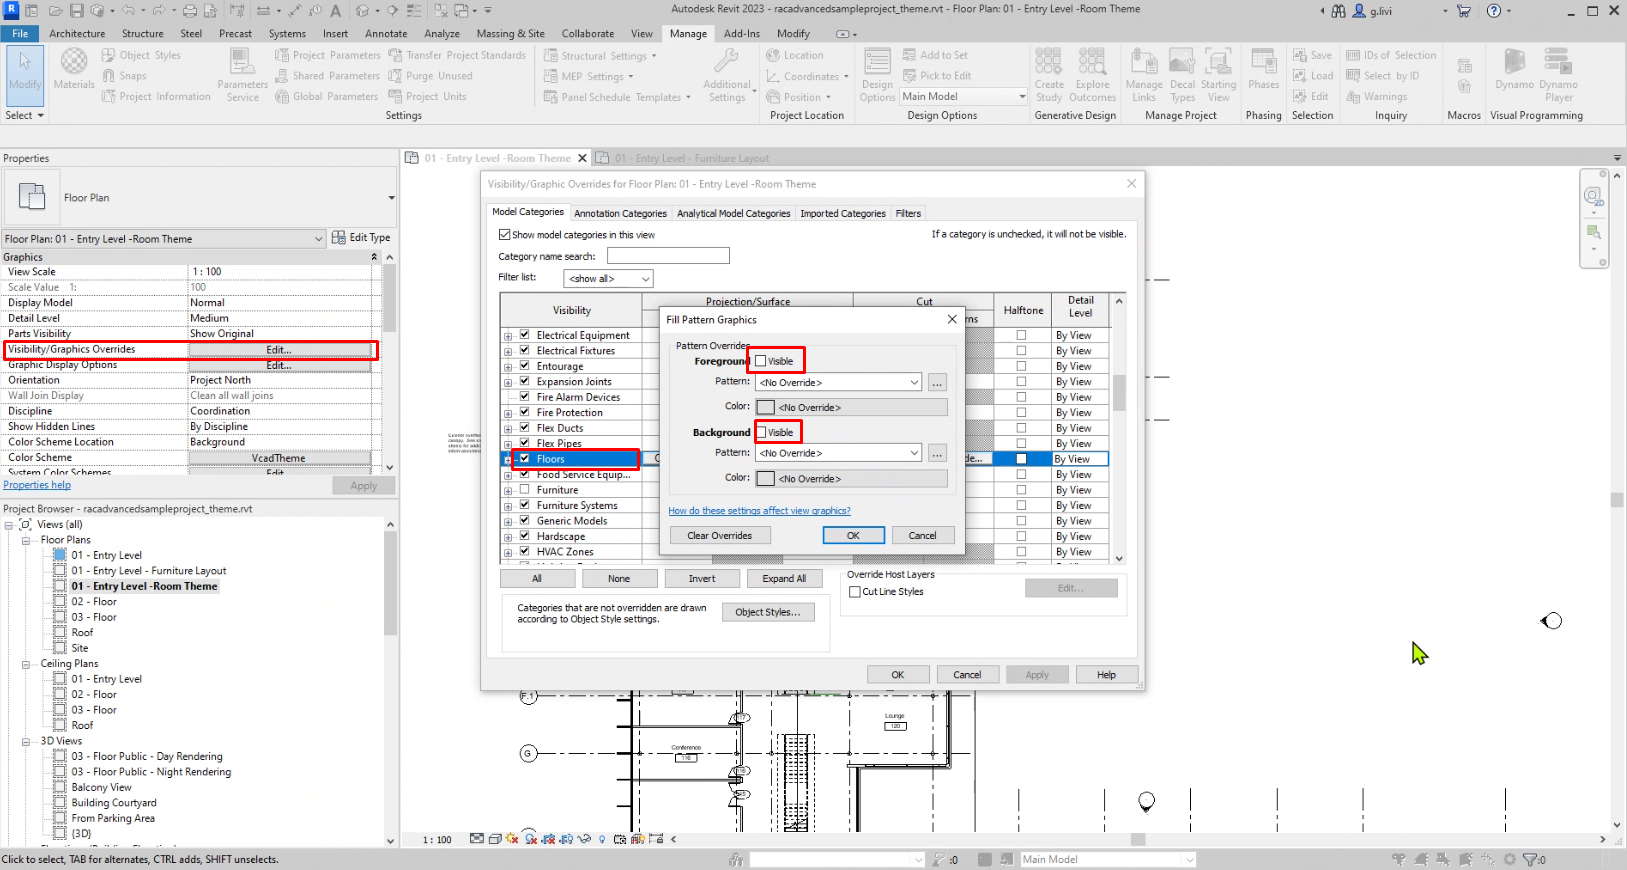
Also hide any elements that may create problems in displaying the theme, in this case the pattern.
From VISIBILITY/GRAPHICS OVERRIDES, uncheck the Pattern Overrides visibility as shown below.
Import to Vcad
At this point, once the file is saved we are ready to import it into Vcad. Remember to include that the view we have been working on is included in the conversion set so that it will be converted by Autodesk Forge.
Click here to find out how