Markers and heatmaps toolbar
The use of markers through Autodesk Forge’s data visualization API opens up many scenarios for using and interacting with Bim model data in conjunction with Vcad.
Let’s see how it works.
Setting up
To use markers the first thing to do is to enable the “Markers” option among the Vcad viewer options in Power BI.
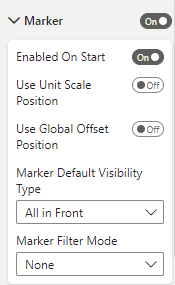
The marker options panel contains the following features:
Enable On Start: if enabled, markers will be active and visible when the report is opened.
Use Unit Scale Position: convert the marker position coordinates from model scale to the viewer scale.
Use Global Offset Position: this option is only considered if the visual’s Marker Position field is bound to position coordinates.
Marker Default Visibility Type: set the deault visibility of the markers, “All in front” or “Occluded view”, i.e. markers in the foreground or not.
Marker Filter Mode: defines which marker will be rendered when multiple markers exist for a single asset.
IoT toolbar
Once you enable the use of markers from the Vcad custom visual options the toolbar will appear in the left side of the Vcad viewer.
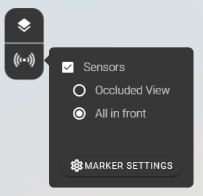
Sensors: enables/disables the display of markers.
Occulded View: enables the display of markers not in the foreground.
All in front: enables the display of markers in the foreground.
Marker settings
Clicking on the MARKER SETTINGS option takes you to the marker configuration window.
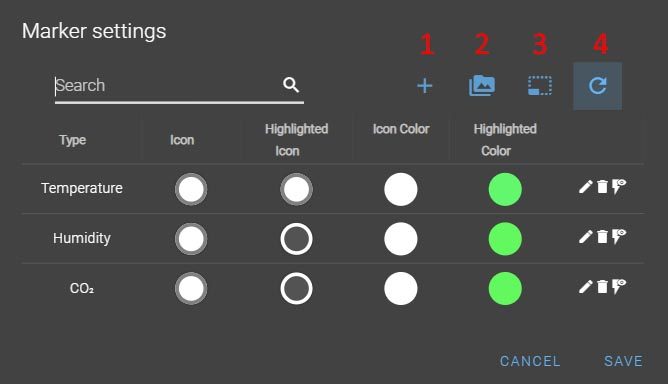
1 Add new style for markers: allows the addition of a new marker configuration.
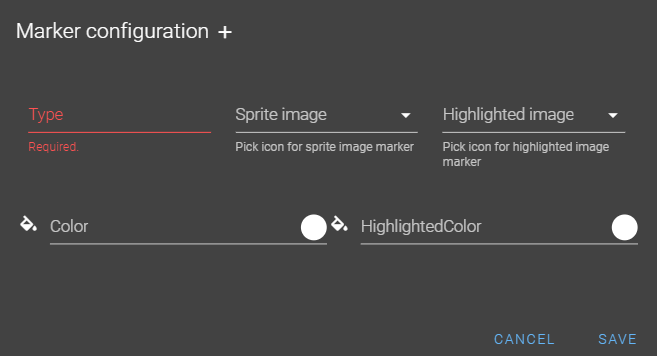
From here you can easily add a new marker configuration to be used for a different type of data, adding colors and icons. By default, the configurations present are: CO2, humidity and temperature.
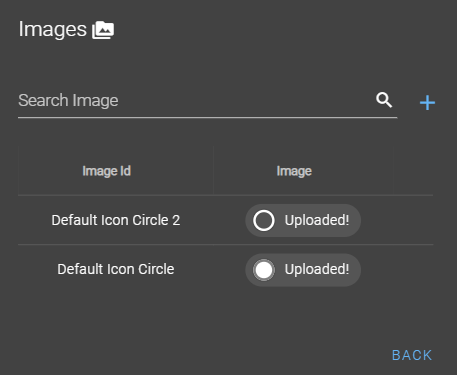
2 Add Image for Markers: allows you to add images to be used in marker icons. Allowed and recommended formats are .svg and .svgz.
3 Resize Sprite Image: allows you to set the size of the markers icon.
![]()
4 Restore default values: resets the default configuration.
Once a new configuration for markers has been saved, it is possible to edit the various options created, delete the configuration, and preview the icon used by acting on the icons at each item.
![]()