Vcad provides users with a number of pre-configured templates, but sometimes you may need to add Vcad to existing Power BI reports. How you achieve this varies slightly based on your setup, keep in mind that here are two different viewers available in Vcad, the Open viewer or the Forge® viewer from Autodesk. There are also differences in the version of Vcad used, either Vcad standard version or Vcad for Autodesk Bim 360®.
Let’s have a look at how to implement the Vcad custom visual in an existing Power BI® report, specifically we will be going over how to do so using Vcad standard version. There are three main steps we will have to execute:
- Import the Vcad custom visual into an existing report.
- Import the Model data extracted by Vcad into an existing report.
- Setup the custom visual to render the desired 2D/3D model.
Step A: Importing the custom visual
First of all you will need to have the .pbviz file, which is the actual custom visual, to import into Power BI®. The .pbviz file is available, on request, to all users of any of the paid versions of Vcad.
Once you have the .pbiviz file you will have to import it into Power BI®. This procedure is the same for every version of Vcad.
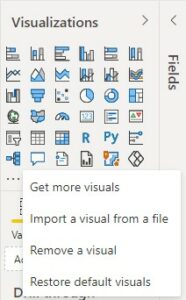
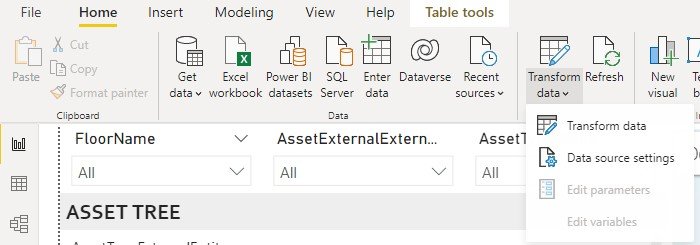
In the Visualizations pane of Power BI® Desktop, click on the three dots, then select “Import a visual from a file”.
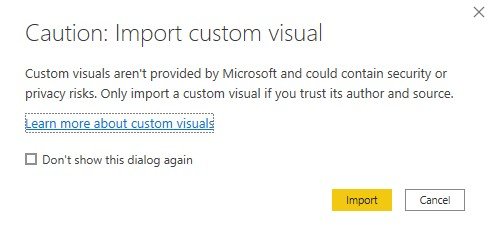
In the warning popup that will appear, click on “Import” and select the Vcad .pbviz file to import.
Step B: Importing the extracted model data
To import the model data Vcad has extracted you need to download any of the templates that Vcad makes available to users.
N.B. You will need to have already imported a model into Vcad in order to download a PBI Template.
Then after opening the downloaded template, you will open the “Transform data” section.
From there, select all present tables, right click and “copy”.
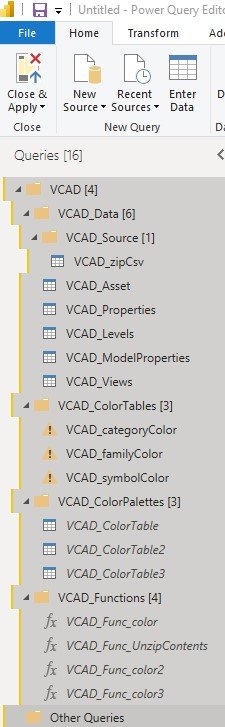
After that just open the “Transform data” section in your existing report, right click on the left column and “Paste”. Now your report will contain all the tables with the data extracted from Vcad.
N.B. The Power BI dataset created from an .ifc file is different from that created using other file formats, for example with .rvt, .nwd, .nwc file formats.
Step C: Setting up the custom visual
After importing the .pbviz file and model data into the report, you have to configure the custom visual. It will only take a few simple operations, which differ based on the type of version used.
In this article we will see how to import Vcad for using: Standard Vcad with the Autodesk Forge® viewer.
After following steps A and B you can add Vcad to your report like any other visual by clicking on the Vcad icon in the Visualizations pane of Power BI®.
The blank visual will be added to the report.
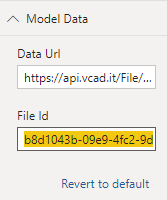
First you need to setup the File ID to use for the custom visual, this is the information that will allow the interaction of the model with the rest of the data in the report. To do so, select the custom visual and enter the File Id in the Ifc File ID field in the Vcad custom visual options.
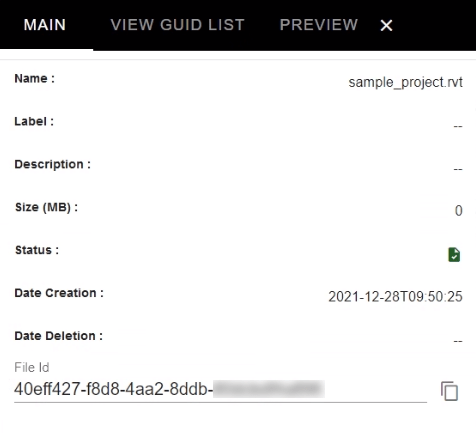
The File Id of the new file can be retrieved by clicking the INFO icon in the list of uploaded files at the file itself.
If the model is not immediately displayed just switch between pages in Power BI so that the custom visual Vcad is reloaded.
Doing so will populate the Ifc File Id field in the Ifc Data tab in the Vcad options. This code identifies the model to be used in the custom visual.
N.B. Make sure to select the model that matches the model data that was imported in step B.
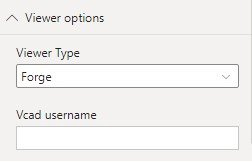
Select the type of viewer to use, in this case Forge by Autodesk®.
To do this, after selecting the custom visual Vcad in Power BI® desktop, you must select the “Forge” item from the “Viewer Options”.
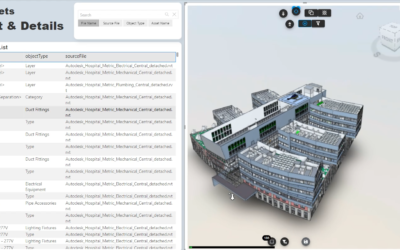
At this point you can build your report adding other data visuals with the model data and they will be automatically linked to the model.
Furthermore, you can connect the data already present in your report using the ExternalID or the Tag columns in the extracted datasets to link the rest of the report to the model according to your needs.
For some ideas on how to get started creating powerful reports, click here to learn how to assign colors to model assets.
Click here to see how to import the custom visual into a pre-existing report in standard Vcad with the Open viewer.
Click here to see how to import the custom visual into a pre-existing report using Vcad for Bim 360®.